How to back up your Fairphone 2
These days, our phones have more in common with computers than those boxy phones that would call by turning a numbered wheel (remember that?!). And just like regular PCs, your pocket-sized “computers” are packed with data and personal information that you certainly don’t want to lose.
That’s why we recommend doing regular backups. Our support team fields lots of questions about the best way to do backups, especially from people who are sending in their Fairphone for repairs. But it’s best not to wait until disaster strikes! No matter how careful you are, you never know when a rainstorm, washing machine incident or thief will ruin your day.
It only takes a few minutes to back up your phone and keep your information safe. Below you’ll find detailed instructions on the easiest way to back up your data. And best of all, for a basic backup, you only need to do it once! Just set it and forget it for maximum peace of mind.
Note: We’re using screenshots from the Fairphone 2, but these tips will work for any phone with Android 5.1 or higher plus Google Mobile Services.
Back up your data with Google Mobile Services
The easiest way to do a simple, automated backup is with the Google services that come pre-installed on the default Fairphone operating system. The only thing you need is a Google account, which you probably already have set up. To back up your data and personal information:
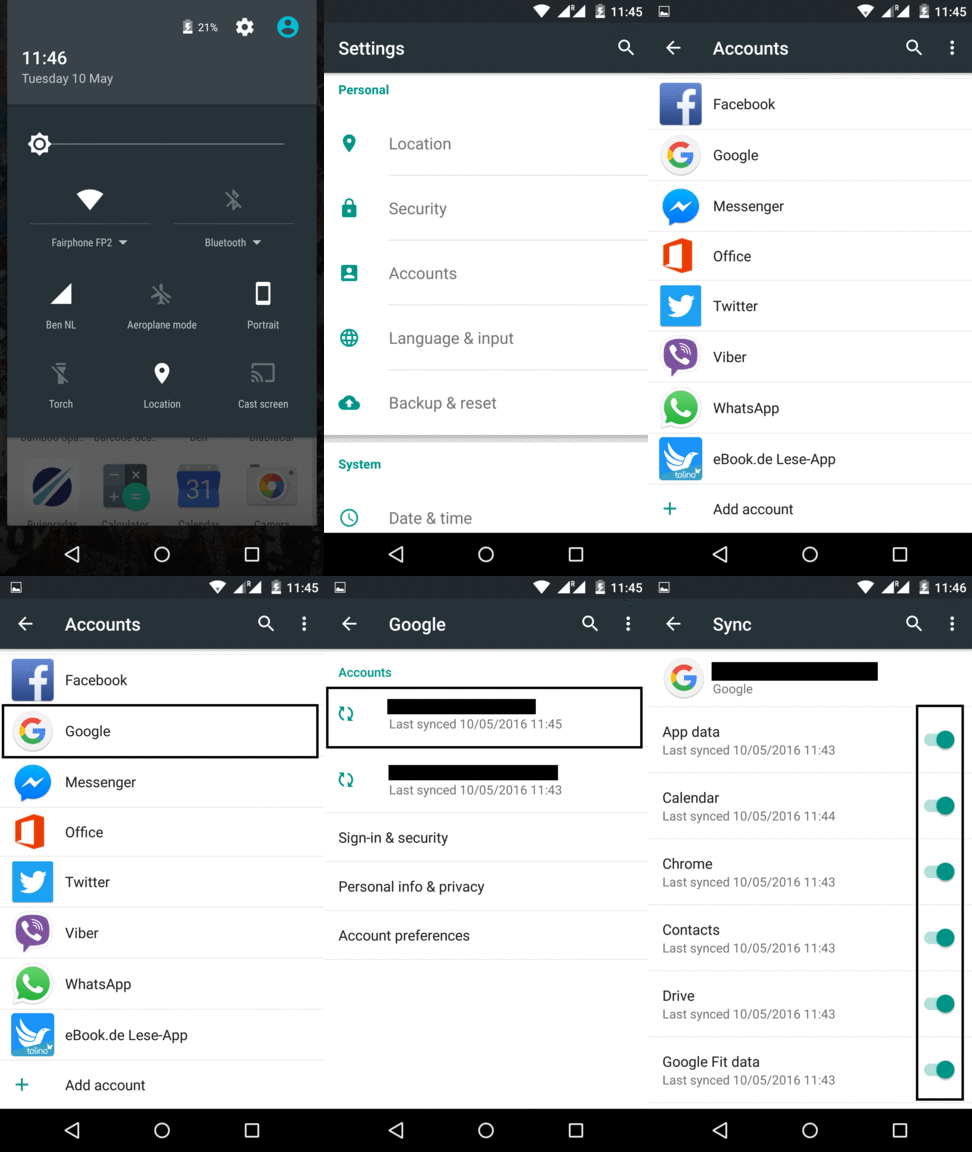
1) Go to Settings > Accounts > Google and tap on your email address. If you see more than one email listed under your Google account, pick the one you want to use for your backup.
2) You’ll now see a list of everything you can sync (backup) using your Google account. Use the little bars on the right to switch the sync function on (green) or off (gray) for different types of files and information.
3) Under each category, you can see when the data was last synced. (This generally occurs repeatedly throughout the day or whenever you make a change or add information.) If you’d like to force the backup to start, tap on the settings icon (three vertical dots at the upper right corner) and select “Sync now”.

WhatsApp tip: If you want to be sure that you don’t lose your WhatsApp chats, you’ll need to back it up separately on your Google Account. Go to All Apps > WhatsApp and tap on the three vertical dots and the upper right. Then tap on Settings > Chats > Chat backup > Back up.
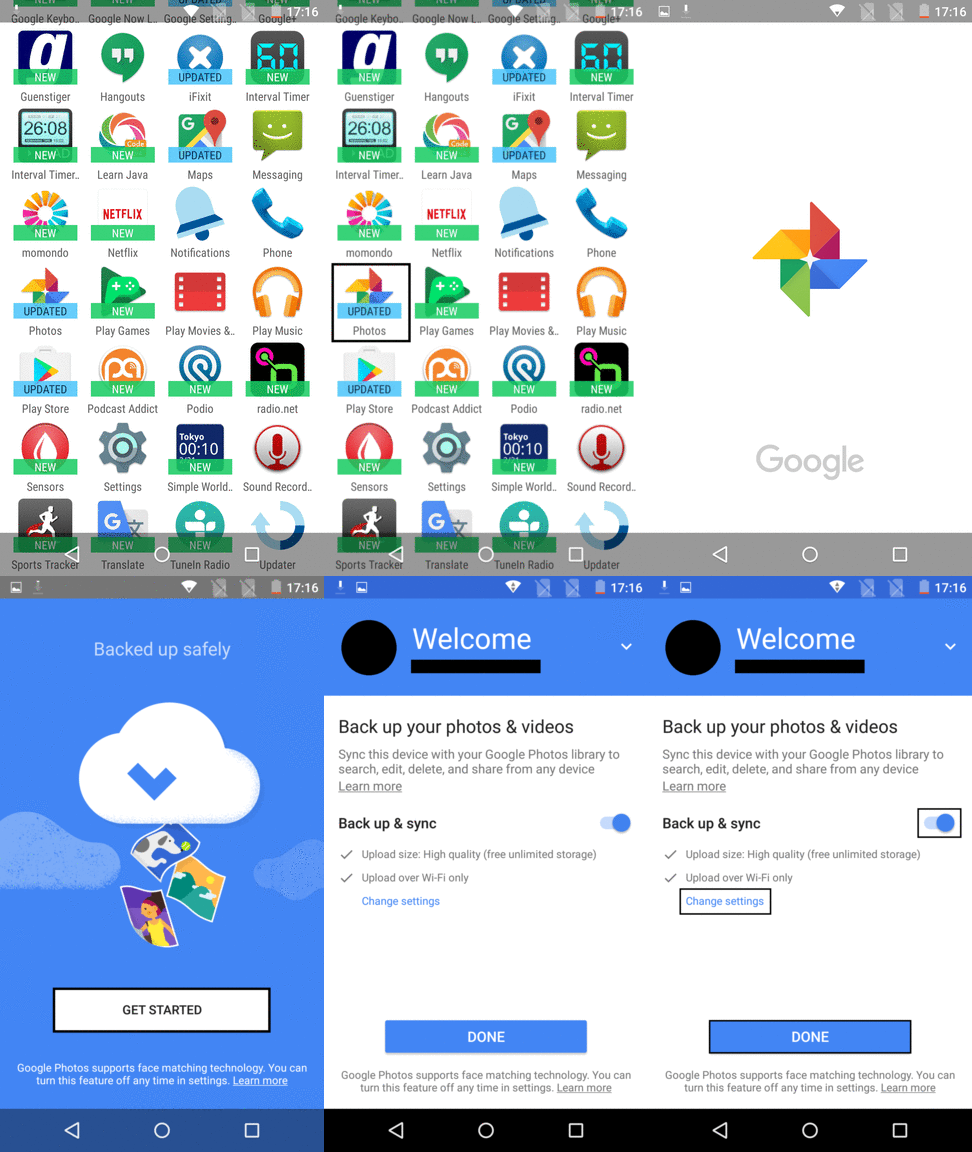
Photo tip: The first time you use Google’s photo app, it will ask you if you want to save your photos in “high quality” or “original size”. If you pick the first option, you can save an unlimited number of photos.

Back up your settings with Backup & reset
The first step ensures that you’ve backed up information like your calendar, contacts and music, apps and movies that you’ve downloaded through the Google Play Store. This next step saves your settings for apps, Wi-Fi details, passwords, bookmarks and more. To back up your settings:
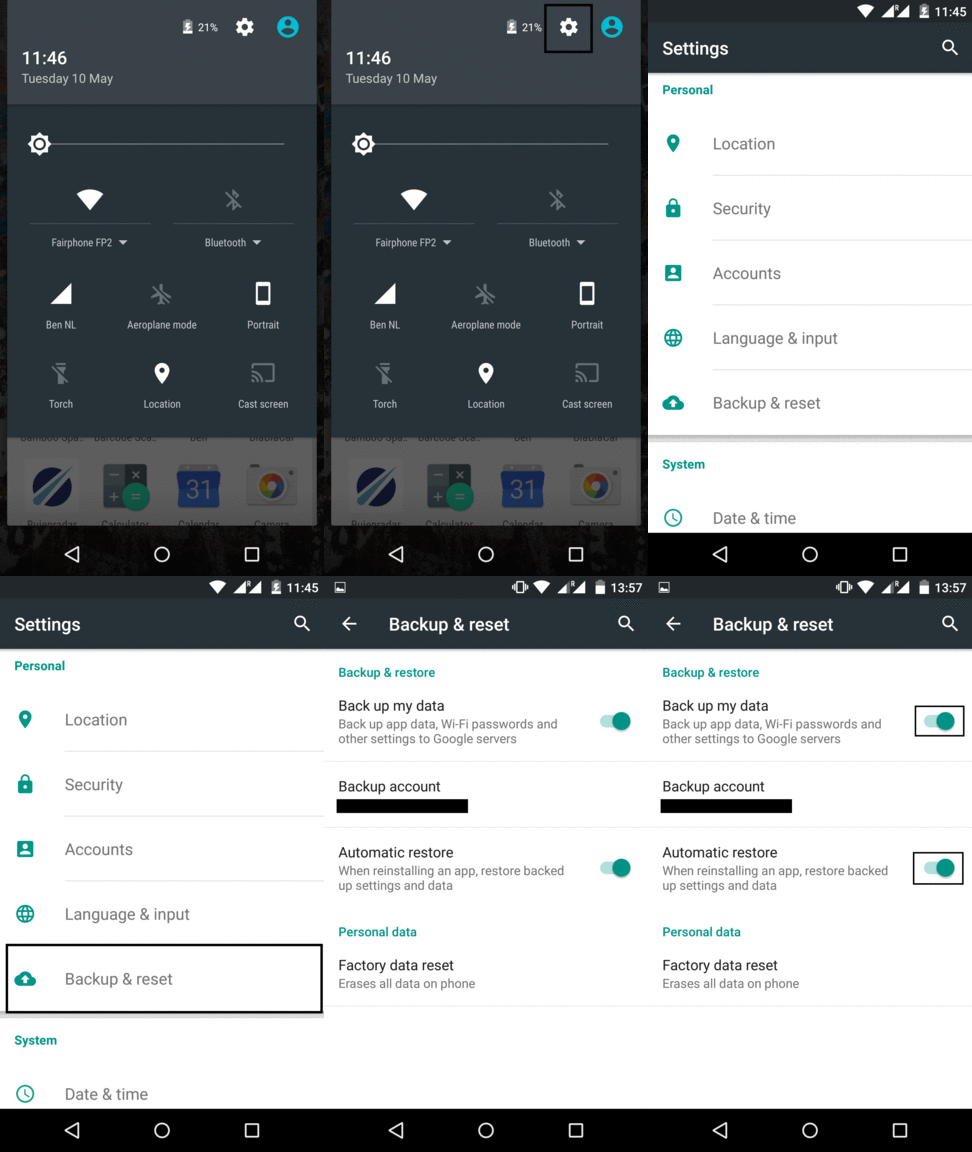
1) Go to Settings > Backup & reset
2) Make sure “Back up my data” and “Automatic restore” are both switched on (green).
Note: Backup & reset will back up app settings wherever possible, but some apps make not have this functionality.

Back up your private files manually
This final step requires a little more effort. You’ll need to do a manual backup of any files that you’ve saved to the internal storage or SD card, such as photos, movies or music. To back up your private files:
1) Connect your phone to a computer. As soon as the computer recognizes your device, you’ll see “FP2” appear in your file manager. (If your phone isn’t visible, open the pull-down menu on your phone, tap the message that says “Touch for other USB options”, and select “MTP”.)
2) Click on FP2. You’ll immediately see a folder for internal storage, as well as one for your SD card (if you are using one). Simply find the relevant folders (music, photos, etc) and copy them over to a safe location on your computer.
Note: Because this step isn’t automated, you may want to set a reminder to do this weekly or monthly.
Getting your data and files back on your phone
Whether you’ve sent your phone in for repair or decided to clear your data and return to factory settings, if you’ve followed the steps above, it’s easy to get all your information back on your phone.
1) Turn on your Fairphone.
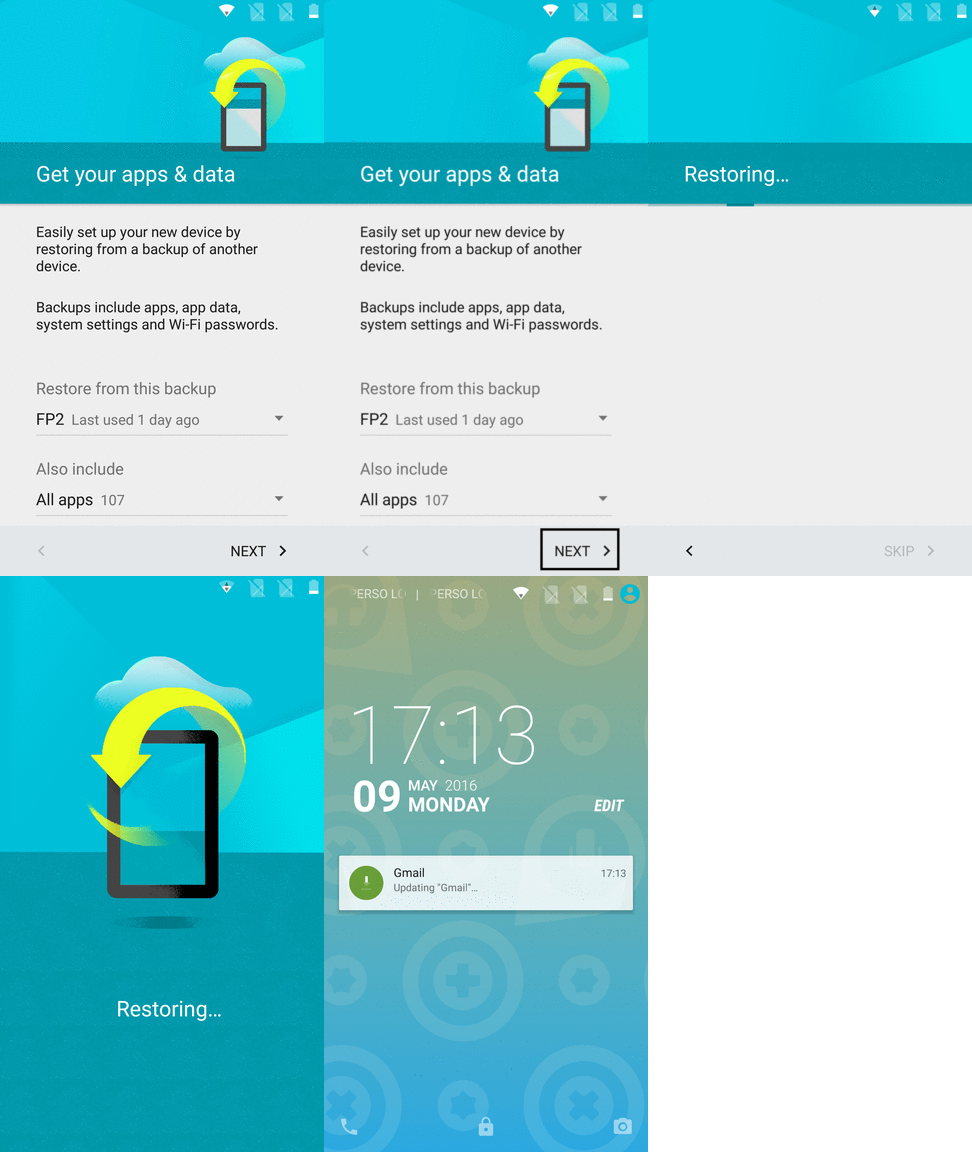
2) You should automatically see a prompt from the Google setup wizard that will ask you to enter your Google Account details. Make sure you’re connected to Wi-Fi, log in to your Google account, and the wizard will ask if you want to restore all of your data. Your phone will need some time to download all your apps — it may take up to an hour.

3) If you have any files that you copied over manually (like photos or music), you’ll still need to put this back by hand. Plug your phone into your computer and copy the information back into the relevant folders.
Note: The first time you open the Photos app after you restore your data, it will ask you if you want to sync with Google Drive. Say “Yes” or you won’t be able to see them. This is also the case for WhatsApp.
More advanced backup options
The information provided above should be enough to cover the backup requirements of most Fairphone users. However, if you require an additional level of security or encryption, there are a range of other apps and services on the market for backing up your data. We don’t have any specific recommendations, but please feel free to share your favorites (along with any other back up tips and tricks) in the comments.


